The Hand
Mold

A difficulty arose during the making of the fibreglass mold, I didn't know how to approach making the prosthetic, and researching into different molds really confused me, and in the end I had to get in touch with multiple peeple from the industry , who helped me out tremendously, and suggested various ways of approaching this.
After having the discussion with some tutors also, it occured that it needed to be a two-part mold in order to achieve the prosthetic piece. In terms of fibreglass, I hadn't actually made a two part fibreglass mold before , especially on a hand, and having the problem with my previous project where it went wrong, I faced bigger challenges of making two fibreglass molds, one for my face, which I was confident enough to make, and then had the challenge of making a hand fibreglass mold.


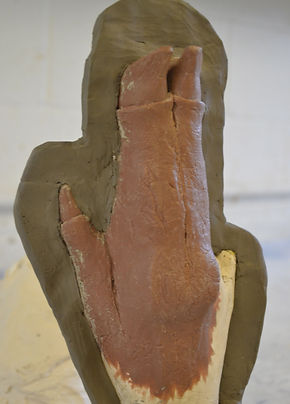
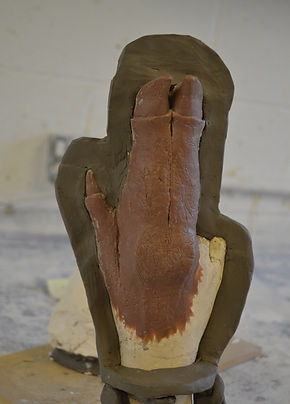
1. A clay wall was added around the clay sculpt of the hand, laying centre point over the top, so it allowed a back and a front to be fibreglassed seperately. A mid way point on the top allowed enough room.
2. The wet clay was placed on a flat board, and rolled out with a rolling pin to get perfect flat edges, and ideally a flat, even surface all the way through.
3. Wet clay was added all in the small crevices around the mold, and rounded off with a small scalpel. All uneven edges of the clay was cut into small, thin rectangle shapes so all the outer edges was straight.
4. A clay wall was also added around the wrist area so it was easier to make the fibreglass mold, and so I had something to grip onto when demolding.


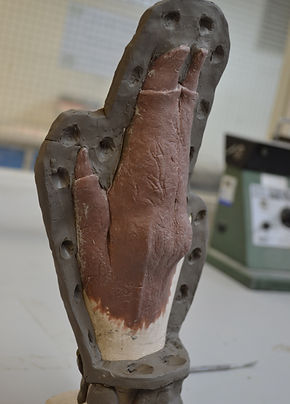










5. After being told by a tech dem that the wall needed to be brought forward otherwise it could cause complications, I then shifted the wall forward slightly at the top, so the hoof was more visible on the back.
6. Keys were then added to the outer clay wall, so they could be drilled after the fibreglass stage, this allowed points for it to bolt back together when the silicone is added.
7. An overview of the keys/clay wall and sculpt itself before the fibreglass process takes place. Clay was also added to bulk out and support the bottom of the clay wall. Poly-wax was added to prevent fibreglass from sticking
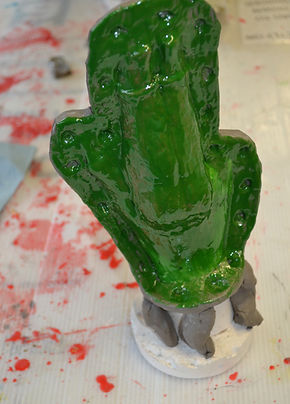
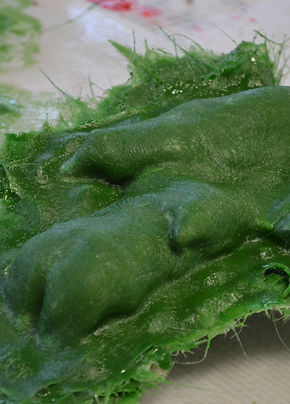
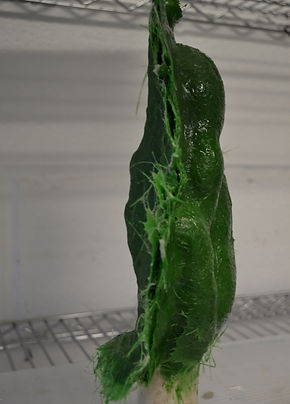
8. 50g of gel coat and 1% catalyst were thoroughly mixed together, along with green pigment. A thin layer of the gel coat was painted with a brush until the entire sculpt was covered.
10. Angled view of the gel coat when tacky.
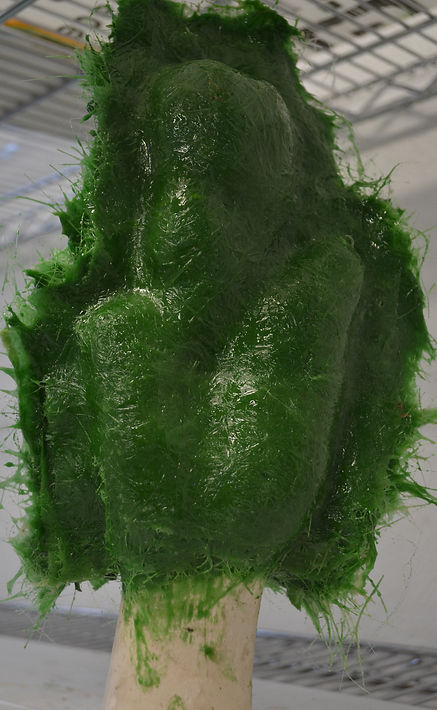
11. Thin layers of fibreglass tissues were added first, along with 100g of resin and 2% catalyst. Each sheet was carefully applied around the sculpt.
12. The fibreglass matting sheets were then added, cut into various shapes and sizes to fit the sculpt, and to avoid air bubbles. The sheets were saturated in resin, and then applied when the sheets were soaked.
13. Side view of when the fibreglass layers have completely dried, after multiple layers have been added, it is then time to remove the wet clay that has now dried out.
14. After all the clay had been removed from the other side, I then cleaned the outer edge as much as possible before applying the first coat of gel coat to the other side.
15. Gel coat was then added/painted onto the other side, poly wax was then added again to the outer fibreglass, and on the plaster mold to prevent the fibreglass from molding itself together. 4 layers were added.
16. Side view of the gel coat after it had dried, I waited about an hour for this to dry, as the drop in temperature delayed the drying time, usually in hot weather, it cures quicker.
17. Thin layers of fibreglass tissue were then added to the mold, getting into all the deep curves and small gaps in the sculpt, ensuring all areas were covered.
18. Fibreglass tissue has now all been added, and now it is time to apply the fibreglass matting.
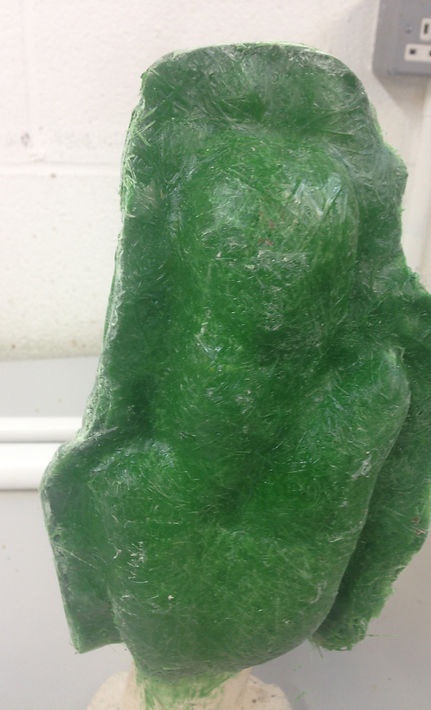
19. Side view of the completed hand mold after all the layers had been added.
20. close up view of the completed fibreglass piece, the piece of fibreglass that hadn't been stuck down properly also needed to be touched up and stuck down properly before it fully cured.
21. Completed fibreglass mold, 24hr wait until the fibreglass mold can be demolded once cured and dried fully, judging by how cold it was in the room, curing would take a while, so I guessed a day would be ideal.
22. Once the fibreglass mold had dried, I decided to use the vibrosaw to cut off all the rough edges around the mold to prevent any dangerous accidents, and working with a smooth edge is always better and easier to work with.
23. The fibreglass mold was also sanded down to get rid of any smaller sharp edges that the vibrosaw may of missed. The mold is now ready to be drilled and demolded.
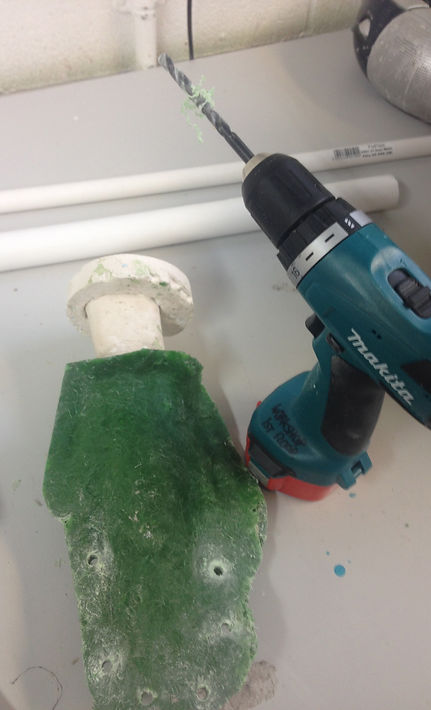
24. Here I had the trouble of drilling the holes because the drill bit was too small, which it found a struggle to screw passed the thick layers of fibreglass, so I had to use the next size up to a 7.5, which went straight through. All the key points were drilled.
25. A close up of all the drilled keys
26. A overlook of some of the drilled key points on the top of the mold.
27. Back view of the keys, then ready to be demolded.
28. Here Sammy helped me demold the fibreglass as she saw me struggling to wedge it open. The thickness of the fibreglass made it difficult to split it apart from the mold inside. We ended up using the block wedges to place in the gaps of the fibreglass, and using a chisel and hammer, we just knocked until it started coming apart.
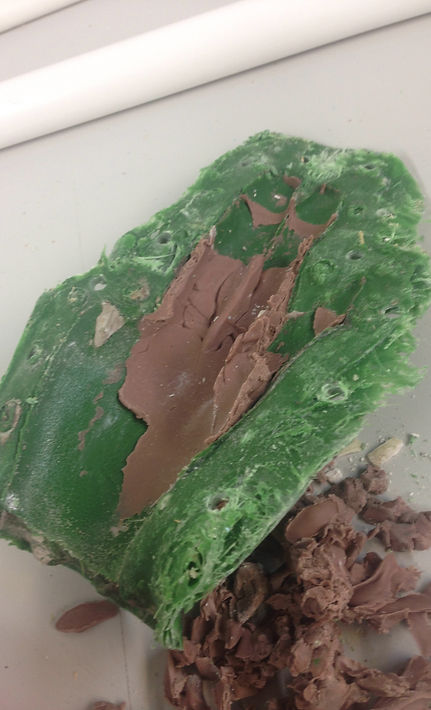
29. Most of the clay from the plaater mold stuck to the fibreglass mold, which made it easier to clean the plaster. The clay then needed to be removed from both the back and front half of each mold, the back half of the mold still needed to be demolded, as the front came off with ease.
30. Once the back mold demolded, I then cleaned the majority of the clay out using sculpting tools, and my hands, most of the clay needed cleaning out under water and scrubbed with a sponge of some sort.
31. A close up of the clay being removed from the mold, and ready to be washed. Removing the majority of the clay made it easier for me to wash the rest out.


32. when I took my mold home, I then put some washing up gloves on to protect my hands from any fibreglass that may decide to piece my skin during the cleaning stage. I used warm water to help the clay melt slightly, and then used a hard brush to scrub away the clay away from the mold, this method worked really well, and the mold was really clean afterwards.
33. A thorough rinsing off of the last bits of clay before drying and cleaning up on the other mold.
34. The one half of the mold drying natuerally before the last bits were dried with a towel.
What did you like/dislike?
How could you improve?
I loved how smoothly the fibreglass sheets layed onto of the sculpt. From a previous project where I didn't get as far as this, I think in my books that is a huge accomplishment, even if the fibreglass could be improved in the future. For myself, I had gained a lot of confidence using fibreglass this time, and actually applying it became quite relaxing. I knew I had time on my side, so I didn't feel the need to rush it, so I think that was the main issue I had last time, my time management The fact everything went on so smoothly, dried nicely and even drilling the keys in was a tough but enjoyable task. I have always been a huge fan of using tools, and even woodshop work, so I enjoyed getting stuck in and being practical.
The part I didn't like the most was getting all the fibreglass tuck to my gloves, which resulted in me repeatedly changing the over. I hated using the wet clay to create the clay wall as the clay just kept falling off, which was rather frustrating for me. The demolding stage was very time cosuming also, as I had to spend hours cleaning out the clay, and on some occasions, the sculpting tools I was using to pick the clay out sliced into my hand a few times, ouch!
The improvement I would make as I have said in previous pages, is the plaster hand would be made of more durable material, such as resin, and the two part mold would be made more accurately. I thought the clay wall could of been thinner, as I found when it had been demolded, that the seam line would be quite big, which could of been avoided. It has been an incredible learning curve for me, and my first experience of making a two part fibreglass mold for a hand is quite an achievement.
The colour also made it seem difficult to visualise where the keys were, so that made it a challenge to determine where I had placed them to start drilling.
9. A side view of the gel coat applied. The gel coat had to be tacky before any fibreglass sheets were applied.